WhatsApp WooCommerce Shopify Automation
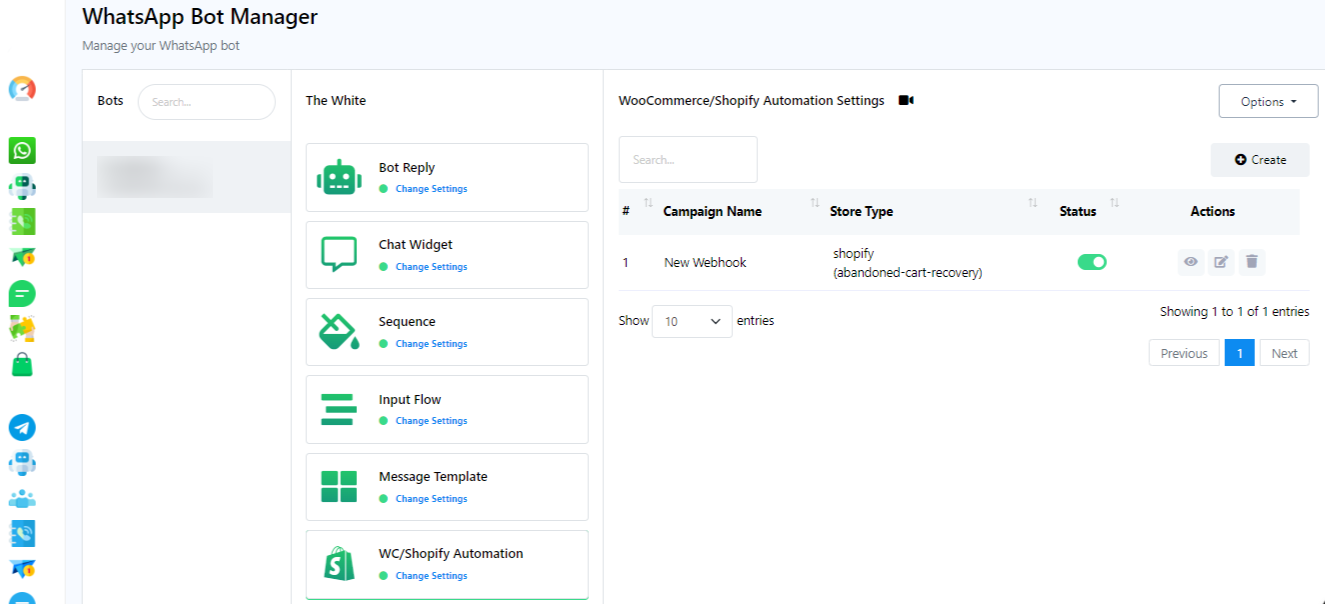
- Accede a la sección de WooCommerce y Shopify Automation en Botconia.
- Click on the `Create` button.
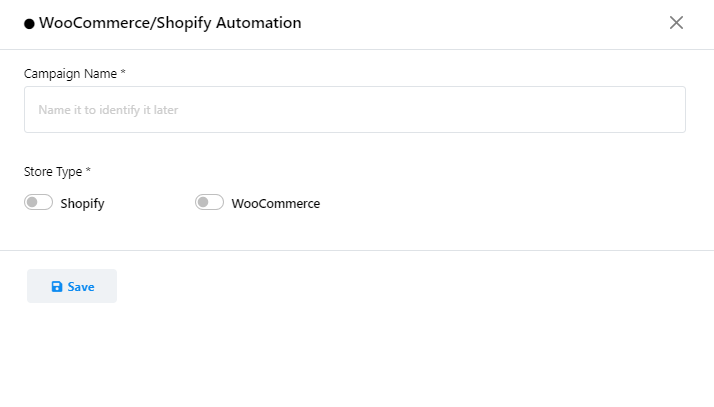
- Fill out the form for the automation campaign:
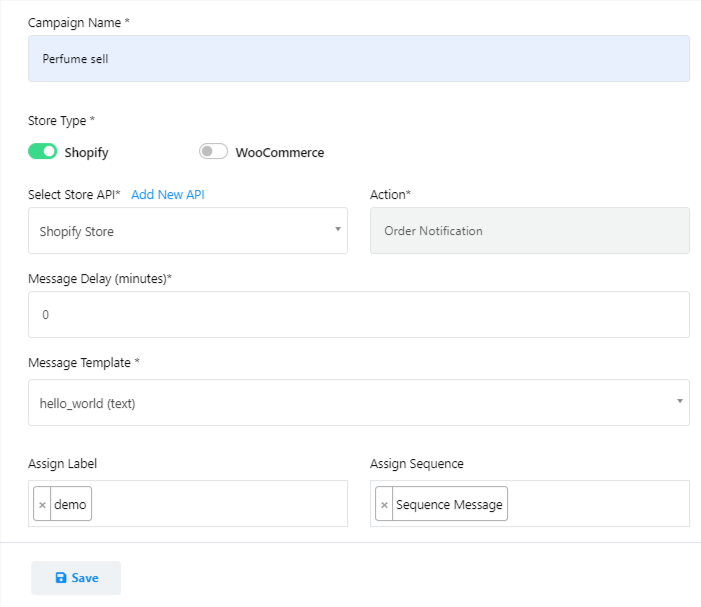
- Provide a name for the campaign.
- Select the store type. (e.g. Shopify)
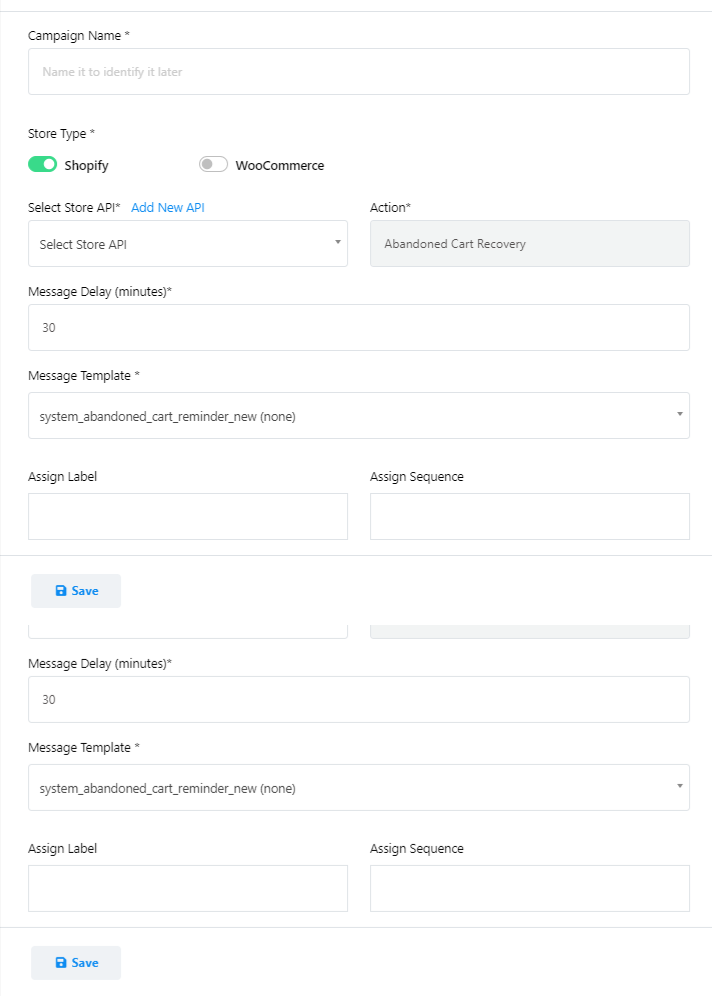
- Choose the Store API from the dropdown list.
- Select the action as `Order notification`.
- Ajuste el retraso del mensaje si es necesario (el valor predeterminado es 0).
- Choose the message template you`ve created.
- In the variable, `system delivery after days`, input the number of days your store will take for delivery.
- Asigne etiquetas y secuencias al usuario según sea necesario seleccionándolas de la lista desplegable.
- Finally, save the campaign.
Note: If you didn’t integrate Shopify or Woo-Commerce then you can integrate them from Add `New API`.
Integrating Add New API
- Acceda a "Agregar nueva API".
- Se abrirá una nueva página “Perfil de comercio electrónico”.
- Select Woo-Commerce or Shopify.
- Now fill `profile Name`, `Store Sub-domain`, `Admin Access Token`.
- Click Save.
Test the Campaign
To confirm that the setup works as intended, create a test order on your Shopify store.
Botconia debería enviar automáticamente una notificación de pedido a la cuenta de WhatsApp del usuario.
By following these steps, you`ll be able to successfully set up and send Shopify order notifications to WhatsApp using Botconia.