Administrador de suscriptores de Telegram
Un Gestor de Suscriptores dentro de una plataforma de chatbot sirve como una herramienta esencial para manejar y interactuar eficazmente con la base de usuarios o suscriptores de tu chatbot. Proporciona una amplia gama de funcionalidades que incluyen la segmentación de suscriptores, herramientas de comunicación, administración de datos, capacidades de automatización y funciones de informes completos. Estas funcionalidades están diseñadas para mejorar la experiencia general del usuario y optimizar la eficiencia de las interacciones con tu chatbot.
Accessing the Subscriber Manager
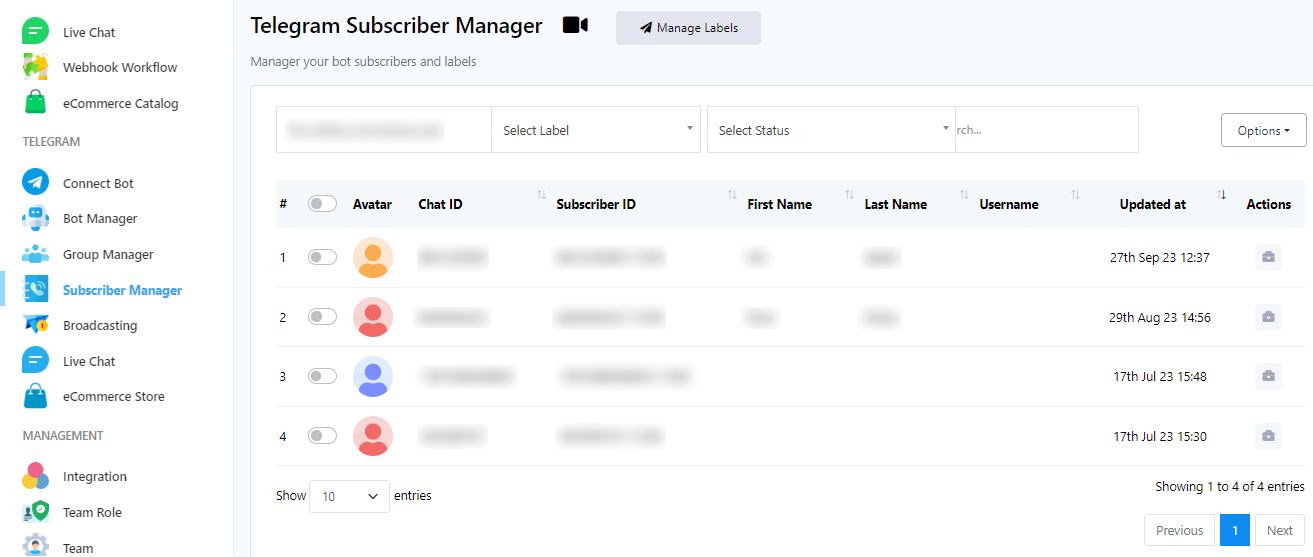
To access the Subscriber Manager in the chatbot platform, follow these steps:
- Navigate to the dashboard.
- On the left sidebar of the dashboard, find the `Subscriber Manager` under Telegram and click on it.
Managing Labels
Una etiqueta sirve como un identificador que se utiliza para categorizar y agrupar datos o entidades de suscriptores. Las etiquetas se utilizan principalmente para presentar una organización estructurada y de fácil búsqueda a la información. Actúan como un medio para agregar metadatos o detalles descriptivos a los elementos, simplificando su gestión, capacidad de búsqueda y organización dentro de los sistemas digitales.
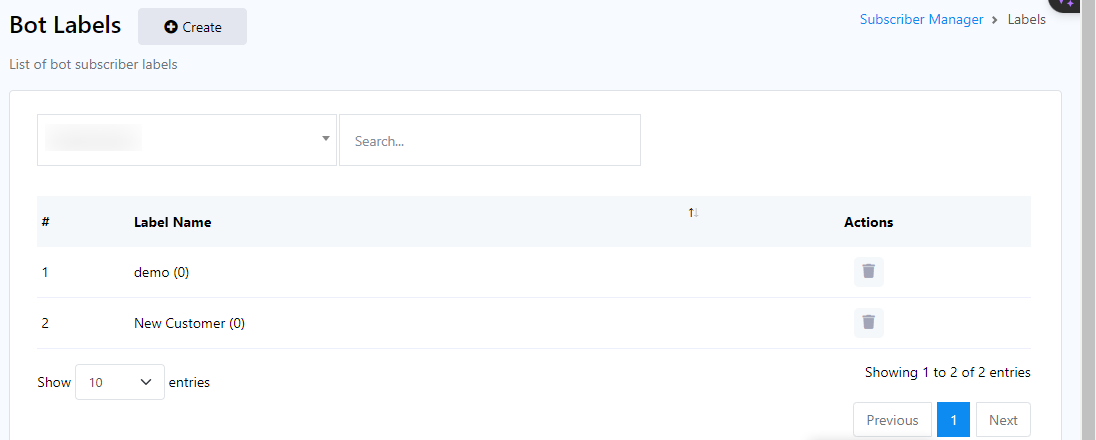
To effectively manage labels, please follow these steps within the Telegram Subscriber Manager:
- Comience accediendo al campo «Administrar etiqueta» dentro del menú del Administrador de suscriptores de Telegram.
- To create new labels for organizing your data, simply click the `Create` button.
- You can also locate labels by conducting a search in the `Search Bar`.
- If you wish to associate a label with a specific bot, click on the dropdown menu, and after selecting a bot, the associated labels for that bot will be displayed below.
Crear etiqueta
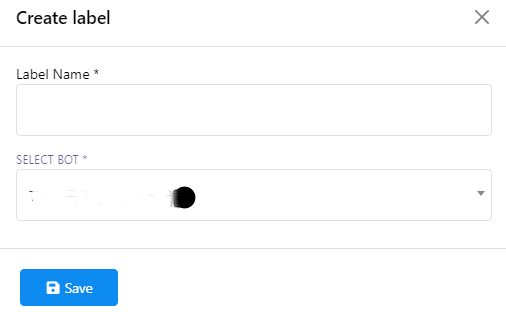
To create a new label, please follow these steps:
- Click on the `Create` button to initiate the label creation process.
- After clicking, youll be prompted to provide a title for the label and select a bot from the dropdown menu.
- Once you`ve filled in the necessary information, save the label.
Delete Label
To delete a label, simply click on the action button next to the label name.

Search for subscribers
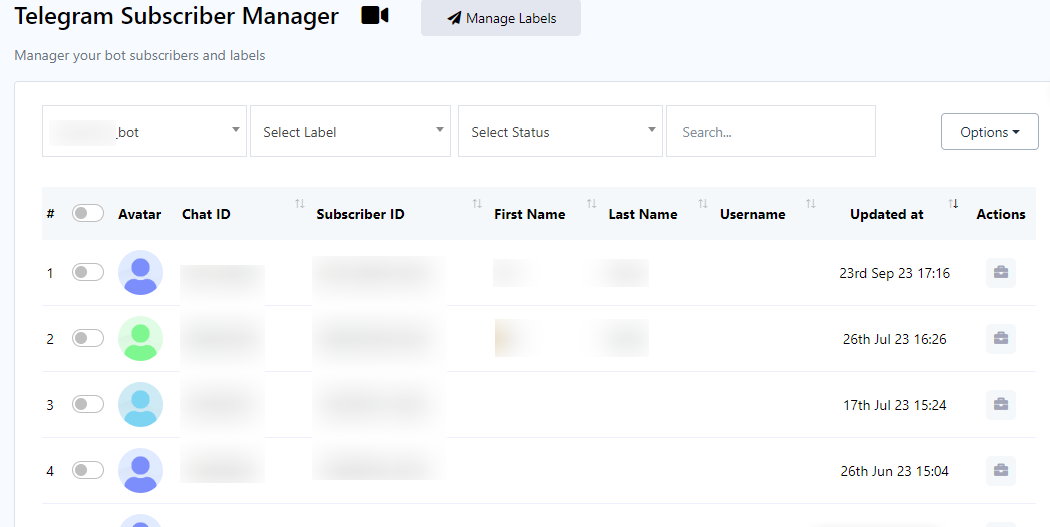
To search for subscribers, please follow these steps:
- Begin by selecting a bot from the dropdown menu located on the left side of the input bars.
- Next, choose a label from the dropdown menu adjacent to the bot selection.
- Once you`ve selected a label, proceed to choose either `subscribed` or `unsubscribed` from the dropdown menu.
- Finally, utilize the search bar to initiate the search based on the criteria you`ve specified in the previous steps.
Opciones
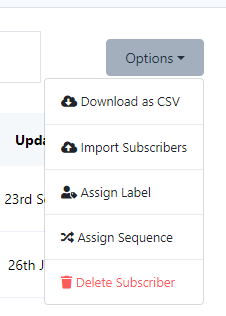
Now navigate to the `Options` button, a versatile feature that enables you to execute a variety of tasks. Upon clicking the Options button, a dropdown menu will unveil an array of choices:
- Descargar como CSV
- Importar suscriptores
- Asignar etiquetas
- Asignar secuencias
- Delete Subscribers
Import subscribers
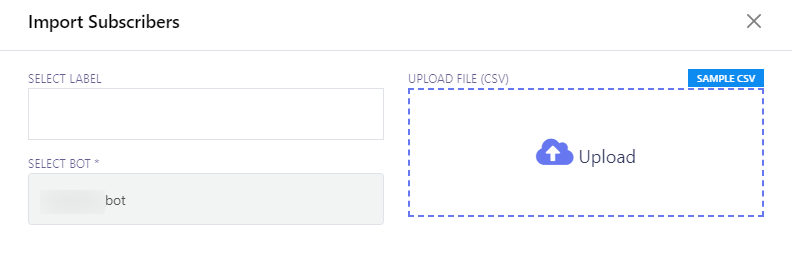
To import subscribers, follow these steps:
- Locate the `Import Subscribers` option in the menu.
- Click on the `Import Subscribers` menu, which will open a modal form titled `Import Subscribers`.
- Within the modal form, you will find two crucial fields:
- Select Label: Choose a label that corresponds to the subscribers you intend to import.
- Select Bot: Specify the bot to which you want to assign the imported subscribers.
- Select the appropriate bot for importing subscribers.
- If you have specific labels associated with the subscribers you want to import, you can designate them here.
- Click the `Upload` button to initiate the import process.
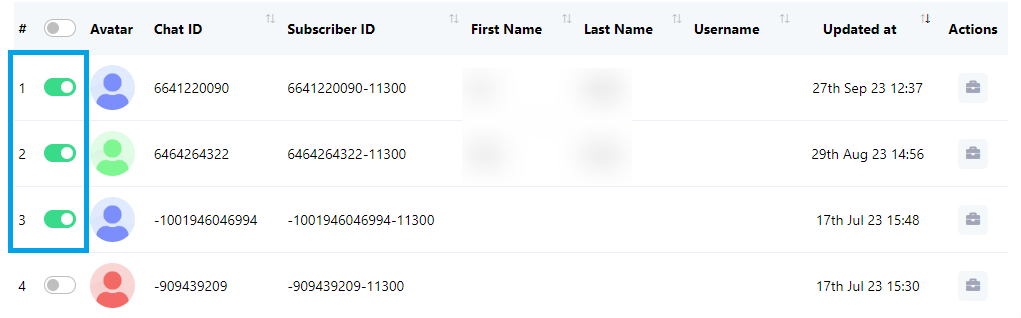
Asignar etiqueta
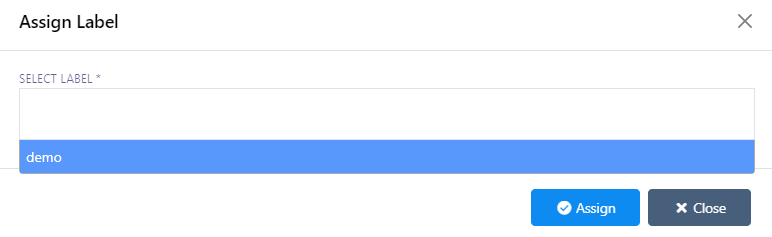
To assign subscribers to a label, follow these steps:
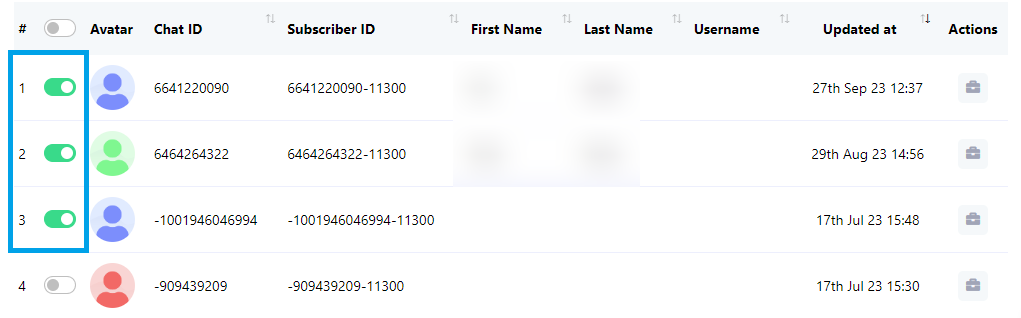
- In the list of subscribers, toggle the subscribers you want to assign to a label.
- Click on `Options` and then choose `Assign Label`.
- Select a pre-existing label from the list. Users can also select multiple labels if needed.
- Click the `Assign` button to complete the assignment process.
Seleccionar
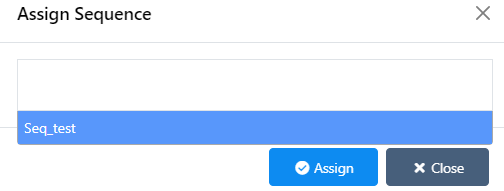
To assign subscribers to a sequence, follow these steps:
- In the list of subscribers, toggle the subscribers you want to assign to a sequence.
- Click on `Options` and then choose `Assign Sequence`.
- Select a pre-existing sequence from the list. Users can also select multiple sequence if needed.
- Click the `Assign` button to complete the assignment process.

Delete Subscribers
To assign subscribers to a sequence, follow these steps:
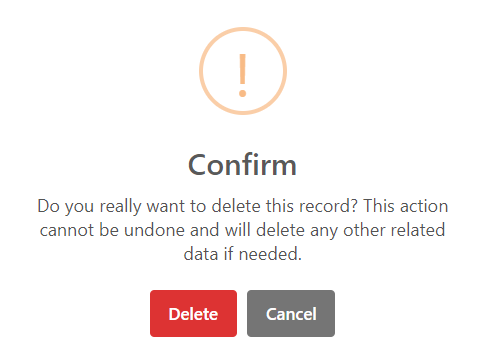
- In the list of subscribers, toggle the subscribers you wish to delete. You can toggle a single subscriber or multiple subscribers according to your preferences.
- Click on the `Options` menu and select `Delete Subscriber`.
- Confirm the deletion by clicking the `Delete` button.
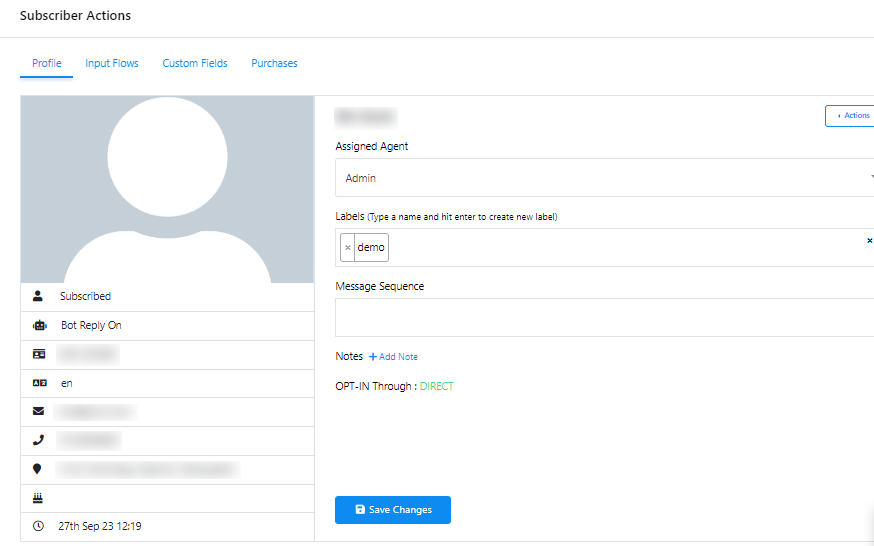
Acciones del suscriptor
For Subscriber Actions, follow these steps:
- Click on the `Subscriber Action` button.
- In the modal, you can perform various actions, including unsubscribing a subscriber, pausing or resuming the bot`s replies, resetting the user`s input flow, or syncing subscriber data.
- Click on `Assigned agent` to designate an agent who can engage in real-time conversations with the subscriber.
- Utilize the `Labels` input field to search for and select an existing label, or you can create a new label.
- Select an existing message sequence to send to the subscriber by clicking on `Message Sequence`.
- To save all the settings you`ve configured, click on `Save Changes`.
- Access `Input Flows` to review data collected from a user`s input flow.
- Click `Custom Fields` to inspect data collected from Custom Fields.
- For an overview of every purchase made by the subscriber, click on `Purchases`.